Thursday, December 15, 2016

Winter Skin Care

If you are like me, then the dry winter months wreck havoc on your skin. My normal skincare routine just doesn't cut it anymore. I still have an oily t-zone but literally, every other place on my body is dry. I have come up with a few tips to keep moisturized...


First, I switched to a body wash that had better ingredients. It's made without parabens and sulfates. It's infused with coconut milk and vitamin e. I would link it to you, but apparently, it's now discontinued. :( But like our hair, those ingredients strip our skin of some of the oils that it needs. Also, while we are still in the shower, I use a sugar scrub every time I shave my legs to remove excess dead skin. This not only helps to get a smoother shave, it really gets all that dead skin exfoliated. I always get itchy with dead skin, so this is a must for me. I exfoliate my face at least twice a week during the winter, also. And don't forget the lip scrubs, because chapped lips and our beautiful liquid matte lipsticks just don't mix well!

After my shower, I slather on my favorite lotion while my skin is still a little damp. It is best to do this step fresh out of the shower because the hot water opens up our pores. We need to put moisture back in while they are open and soak it up. Don't forget your facial moisturizer!

My nightime routine has changed a little, also. I like to use all my normal creams and moisturizer, but for the last step I use a good face oil. I've been loving the Tarte Maracuja Oil for this step. It feels really thick and coats my face well, but when I wake up, I don't feel greasy or oily, it soaks right into my skin. I also like to use a chapstick plus vaseline on my lips at night. I feel like layering products is the only way to go in the winter, just like we gotta layer those clothes! ;)

For anyone suffering from severe, dry cracked feet you should try to massage a generous amount of coconut oil on them, then put on some cozy socks. If you don't like to sleep in socks, then do this while you are enjoying your favorite Netflix show before bed! Do the same for your hands if you need to! Coconut oil forms a protective layer over the cracked skin that helps to keep out other bacterias, it has healing properties, so while it is protecting from the outside it is also healing from the inside.

I hope that my little list will help you with your winter time skin. If you have any other tricks for beating dry skin this winter, share in the comments down below.

Goodnight my lovies, thank you SO much for stopping by!

Wednesday, December 7, 2016

Easy *NOT quick* Turkey Soup

My favorite Holiday is Thanksgiving. You get to be around friends and family without the stress of gift-giving PLUS you get a fabulous meal. If you're like me and typically cook enough food for double the guests, you're wondering what you can do with leftovers. My favorite thing to do with leftover turkey is to make turkey soup. Basically chicken and rice soup, but obviously made with turkey. 


This is such an easy thing to do, but it is very time-consuming. Not in the sense of having to watch it every minute, but you will need a few hours to be at home.

Enough blabbering lets get into it.

So first, take your leftover turkey carcass and remove any big pieces of turkey meat left on it. You can use this for sandwiches or whatever you normally do with turkey meat, OR you can be like me and set it aside to make your soup extra meaty.

After you've removed the meat you want to put the carcass in an extra big pot. Like, you want to be able to fill enough water in it to cover the carcass. I don't measure this, I just add enough to cover the bones. Next, you want to throw in some celery, carrots, onion, garlic, and a couple tablespoons of salt. When I say throw in, I literally mean you don't have to cut the celery or carrots just put them in whole. The garlic I just smash and peel then throw in the chunks. With the onion, I just peel it and cut it in half then toss it in. Your turkey will add a little extra flavor from any seasonings you used while baking it. When you get everything in the pot, put it on the stove and bring it to a boil. I let mine boil for a good 3 hours at a rolling boil. This will cook down your liquid by at least a quarter, and that is a good thing.

Once you're satisfied with your boil time, take the pot off the heat and let it cool down. You want to strain the liquid into an extra large bowl. Place it in the fridge until your ready to use it. The worse part of this whole ordeal is now picking off the rest of the meat from the bones in the pot. Since we left our veggies large, it will be easy to discard them from the pile. Pick through all the bones and get any meat left behind. This meat will be so tender and juicy, you want to get it all out for the soup!!! Once you have all the meat off the bones you are ready to make your soup!

You will want more celery, carrots, onion, and garlic. This time you will dice everything up into medium size pieces. Except for the garlic, mince that as fine as you can get it.

In my dutch oven I added 2 tablespoons of olive oil and sauteed the celery, carrots, and onion until soft; add the garlic and let that saute for just about one minute. Add your homemade stock to the pan plus all the meat you want to add. In my opinion, the more meat, the better! Bring this to a boil and let it cook for at least 30 minutes before eating.

While your soup is boiling, cook some rice. I like to add my rice to each individual bowl instead of adding it to the soup. If you have leftovers, the rice just swells and turns your soup into moosh.

You are now ready to enjoy your HOMEMADE turkey and rice soup. You won't need to add extra salt, at least I didn't, but adding a little pepper won't hurt.

Let me know in the comments down below if are going to try this, or if you have a turkey soup recipe you'd like to share with is!!

Goodnight my lovies, thank you SO much for stopping by!

Recipe break down:
Turkey Stock:
1 leftover turkey carcass
5 stalks of celery
3 whole carrots, peeled
4 garlic cloves
2 onions cut in half
2 tablespoons of salt
Lots of Water

Place the turkey carcass in a large pot. Fill with water. Add all the veggies and salt and bring to boil. Allow to boil and cook down for 3 hours.
Strain out liquid -- set aside.
Pick meat off of turkey carcass --  set aside.

Turkey soup:
Homemade turkey stock
1 cup of diced celery
1 cup of diced carrots
1 medium yellow onion diced
3 cloves of garlic minced
leftover turkey meat.

In a large dutch oven, saute celery, carrots, and onion in olive oil until soft. Add garlic and saute for one more minute. Add your homemade turkey stock plus turkey meat and allow to simmer for at least 30 minutes before eating. While soup is simmering, cook some rice. Add as much rice you want to your bowl and fill with soup. Enjoy!

Friday, December 2, 2016

November Favorites


I wanted to start a little monthly blog to dedicate to my monthly favorites. I'm always switching up my makeup routine so I thought I'd share a few products that I've been loving this month. This month I have five products that I want to share with you guys!

one:
Tarte Maracuja Oil $48
This oil has a few different uses. The one that it's sort of marketed for is to use on your face and neck. Apply two or three drops to your fingers tips then massage onto your face and neck. It's said to moisturize, firm, brighten, and smooth skin. I've been using it in my nighttime skincare routine and even though it's an oil I don't wake up with super oily skin. It kind of just melts into the skin. My makeup applies so nicely the day after I've worn this overnight. You can also use it on your cuticles and smooth frizzy hair.

two:
Loreal Paris Brow Stylist Definer: Brunette $8.99
I love this brow pencil. It's my current go-to pencil when I just want a more natural looking brow. It has a super fine tip making hair-like strokes so easy. It comes with a spoolie attached to the other end to help blend and comb through your brows.

three:
Maybelline Fit Me! Matte + Poreless Translucent Pressed Powder $7.99
This has easily become my favorite drugstore pressed powder. It is silky smooth and does everything it claims to do for me! I don't use it with the little sponge it comes with, I just use a brush. I load up a small brush to set my undereye concealer and my eyeshadow primer, then use a bigger brush to set my whole face. It sets my foundation perfectly and keeps my shine away all day!

four:
the Balm Bahama Mama Bronzer $20
I forgot how much I loved this bronzer. It has the perfect nuetral undertone to use as a contour powder. It's silky smooth and blends into the skin so effortessly. I typically used it to add a slight contour to my cheek bones then go over it with a warmer shade of bronzer to get such a natural sunkissed look.

five:
Lancome Blush Subtil: Rose Fresque $32
As much as I love this blush, I don't think I'd shell out the money for just a blush, this one was gifted to me. It is such a pretty shade on my pale skin. It has a nice satin finish that just makes the skin look so fresh. Hands done one of my all time favorite blushes!

So, that's it for my November favorites. Let me know in the comments down below what your favorite products are this month!

Goodnight my lovies, thank you SO much for stopping by!

Wednesday, November 30, 2016

Holiday Gift Giving -- Beauty Edition

I don't know about you, but if my friends all gifted me makeup items for ANY holiday I'd be thrilled! Christmas is no exception. Sephora and Ulta both have beautiful holiday sets. You could definitely find something for every beauty lover in your life.


If you are buying for multiple friends I have the perfect idea for you! Sephora has different types of gift sets, i.e. lip glosses, lipsticks, nail polishes, tweezers, lotions and perfume rollerballs. You could buy one set of lipsticks, nail polish, and lotion and divide them up into 3 or 4 little gifts so that each friend would get one nail polish, one bottle of lotion and so on. This would be great if you want to help a friend step outside of their comfort zone with their color choice! ;)
Try these: The Soft Metals Nail Polish Collection $19, Nest Eau de Parfum Travel Spray $12, and Sephora Collection Mini Cream Lip Stain Set $12. For all three sets, you spend $43 = $14.33 per person, with one lip stain left for yourself!

If you have a friend that is an eyeshadow hoarder like myself, the holiday collections are perfect for them. So many makeup brands make mini eyeshadow palettes that are similar to the larger size for a fraction of the price. The best part, they are limited edition and any makeup enthusiast would love to receive a limited edition product! Try the Too Faced Chocolate Shop Collection with a huge selection of eyeshadows, blush, bronzer, highlights, lipstick, mascara, and eyeshadow primer. $58 ($312 value!)

For your bestie with a lipstick obsession: NYX Liquid Suede Lip Cream Vault Set. For $50 you get all 24 of the NYX Liquid Suede Lip Creams. That is about $2 each in the set when they retail for $6.99 individually. OR you COULD buy the vault set and divide it into little gifts for a few of your besties!

Another idea for a cute gift is to get the limited edition brush sets. You can't go wrong with a nice set of blending brushes. This Sephora Collect Glimmer in Her Eye set is simply gorgeous!

A couple of do not's for the holiday gift giving:
Steer clear of buying foundation for a friend. Unless you know her favorite brand and her color, it's just not going to work well trying to color match from memory.
Fragrances are another hard thing to buy for someone. If you want to buy perfume, the deluxe sample size or rollerballs. Unless, of course, you know exactly what the person wears.

I hope that I helped to give you some ideas for the makeup lovers of your life. I love to give others things that I love. Let us know in the comments if there are any gift sets that you will for sure be purchasing for someone this Christmas season!

Goodnight my lovies, thank you SO much for stopping by!

Friday, November 25, 2016

Tips for the Perfect Holiday Look


Sometimes I can make miracles happen with my makeup brushes and sometimes I feel like I'm correcting my mistakes as fast as I'm applying the makeup in the first place. I've created this look for any holiday party or event you're going to. It can be worn with any look you choose.

I started this look off with my eyes, because if I need to fix mistakes or start over, atleast I only have to re-do my eye makeup and not my whole face. I started off with my brows because I want to see where the tail of my brow ends after I've filled them in.

It's not easy (for me anyways) to do a good winged eyeliner, but I've recently discovered an almost fool-proof way. First I start off with a small angled brush and black eyeshadow. I use an index card to help me make a straight line. I line it up with the corner of my eye so it's angle goes up to my brow. I use the eyeshadow to first draw a soft guideline, then using my liquid liner I follow the same line. Easy-peasy.

With a different angled brush and a tiny bit of makeup remover, clean up any mistakes to ensure a nice, sharp line. I also used this technique to clean up my brows if nesessary.

I added some demention to my eyes with a little bit of eyeshadow in the crease, I used a light brown, a dark brown, and a smidge of black for this. Also, use the same crease colors on the lower lash line. I used the same small angled brush with black eyeshadow to go over the eyeliner to help set it in place. I applied two generous coats of mascara to my lashes and my eyes are done.

Since I want to wear a bold lipstick the rest of my face is pretty simple. I used a little bit of bronzer to add a soft contour to my cheeks and forehead, a tiny bit of a natural blush, and of course some highlighter to my cheeks, nose and cupids bow.

For the lips I used a pinky-red color but this eye look could literally go with any lipstick color. I used a small brush with a tiny bit of concealer to clean up the edges around my mouth. This was a traditional lipstick that I wanted to make matte so I dipped my finger into some loose setting powder and dabbed it on my lips until they were fully coated and matte.

I hope that this gives you some inspiration for your holiday look, or gives you some helpful tips on how to fix any mistakes that might happen. Remember to stay confident and don't get discouraged when a little mistake happens! It's only makeup and you can wipe it away and start over. Tag me on instagram or twitter if you re-create this look!

Goodnight my lovies, thank you SO much for stopping by!

Monday, November 21, 2016

Affordable Hair Care

As a licensed hair stylist I will be the first to tell you that luxery hair care is worth every single penny that it cost. I also will be the first to tell you, if you don't have the money then don't spend it. So I'd like to tell you some of the haircare products that I've tried from Sally's Beauty Supply that are actually worth the money, but won't break your bank. 


First is the Miracle 7 Silk Leave in Mist. This sells for $14.29. It's a leave-in conditioner for dry or damaged hair. It's used to detangle, soften, strengthen, and restore moisture. Plus side, this stuff smells so AMAZING!

Miracle 7 Sulfate-free Shampoo is great for anyone that needs a more delicate shampoo. It is formulated with Argon Oil to help protect the hair while delivering moisture. It's great for anyone with brittle hair or damaged hair from the sun or hair color.

Ion Cool Blonde Shampoo is good for anyone with blonde hair. It is a toning shampoo to restore blonde hair. It's used to get rid of brassiness or yellow tones from blonde hair, both natural or color-treated blondes. I tell my clients the best way to get results from a toning shampoo is to shampoo their hair and let the suds sit in the hair for a couple of minutes before rinsing.

Hot Tools Curling Irons are great irons. They last a very long time and are very affordable. They range in price depending on the size of the iron, but the 1 inch barrel is $42. They have a nice long cord with a swivle base, quick heat-up time, and 10 heat settings.

Ion Ceramic Thermal Round Brush. It's a must to have a good round brush under your belt. You never know when you will need to give yourself a good blowout. These Ion brushes are super inexpensive but are great tools. They feel sturdy in the hand, but glide effortessly in the hair.

The last item I have for you in a good Wide Toothed Comb. They are must to detangle wet hair. It removes any tangles without pulling and stretching the hair shaft. Use a wide toothed comb to evenly distribute conditioner while in the shower!

If you have any great affordable hair care products you'd like to share, please do so in the comments down below! I'm always game to try out new things!

Goodnight my lovies, thank you SO much for stopping by!

Monday, November 14, 2016

Nude Lips or Bold Lips?

Should I wear a nude lipstick or a bold lipstick? That's always the biggest question I have when finishing my makeup. Should we play it safe or dare to stand out? I love nude lipstick because I feel like I get the most wear time out of it, but I love a bold lipstick, especially around the holidays.


I got this little sample set from Ulta, it's a nude lip paint and a bold glossy lip paint. This set is perfect for day to night wear, plus they are travel size so it's easy to carry them both in your purse. It takes me forever to go through one lipstick so I don't feel bad about buying the minis. 

The nude lip is the Tarte Tartiest Creamy Matte Lip Paint in Namaste. The bold lip is Tartiest Glossy Lip Paint in WCW. You can purchase this gift set here for $12. 

What's your favorite? What's your lipstick of choice for your holiday parties? 

Goodnight my lovies, thank you SO much for stopping by!

Friday, November 11, 2016

Makeup Products Worth the Splurge pt. 2


My last post was talking about different beauty products worth the splurge. I have products from different categories that I feel are worth the splurge, but I also have tons of products that are more affordable that are just as good. I don't want to spend extra money when it isn't necessary and I don't think you want to either!


Highlighter:
I've been on the fence about whether or not I think highlighting products are worth the splurge. I have two really good affordable highlighters, one EXPENSIVE that is meh, and one expensive that I don't know what I'd do without it. Let's talk affordable-- the first is Makeup Revolution Pro Illuminate. I just got this and it's freaking beautiful. It's $7 at Ulta right now, and on sale, buy one, get one 50% off! The next affordable I love is the Wet 'n Wild MegaGlo Highlighting Powder in Precious Pedals. This is limited edition, but if you can get your hands on it, do it now!
My FAVORITE splurge item is the Makeup Geek x Kathleen Lights highlighter palette. This is limited edition, and $39.00, but SOOO freaking gorgeous. The one high-end highlighter that I'm kinda kicking myself in the butt for is the Becca Champagne Pop. Don't get me wrong, it's a freaking BEAUTIFUL color and feels like silk; but it just does not have the staying power I'd hope for. High-end worth it? meh. Not if you're really on a budget.

Eyeshadow:
I own a few affordable eyeshadows, and a palette here, and there. But I think a good eyeshadow is always worth the splurge. They are highly pigmented and blend out like a dream. My recent favorite: The Tarte Tartiest Pro Amazonian Clay Palette. It comes with a hefty price tag of $53 but it blends so easily on the eye and has 16 matte shades with 4 duo chrome shades. High-end worth it? Every single penny!

Brows:
I have tried so many different products for my brows, high-end and affordable. And I find myself comparing everything to the ColourPop Brow Pencils. They go on so nice and are fine pencils that allow you to make tiny hair-like strokes. And for $5 you can't beat it! High-end worth it? Not here.

Mascara:
Has anyone else here tried about a million different mascaras looking for the best one? I have. I still am. During my hunt, I haven't found any drugstore mascaras that are up to par. My favorite at the moment: Clinique High Impact. It doesn't do anything TOO special, but it does lengthen and add volume while staying on all day without any flaking. And, as far as I'm concerned you can't ask for more than that! High-end worth it? I think so.

Setting Spray:
I have two that I like to use. The first is the Wet 'n Wild Photo Focus Setting spray and the second is the Urban Decay All Nighter Setting Spray. Honestly, I can't really tell a huge difference with these two. I get like maybe 2 more hours out of the Urban Decay before my makeup starts to break up and slip slide. If I have a busy day at work I use Urban Decay, if I'm lounging one day I use Wet 'n Wild. High-end worth it? Only if you need to wear your makeup for 10+ hours. 

That concludes my save vs. splurge. Let me know if you have any categories you'd like to talk about! Also, if you have found any affordable products that are better than the high-end let us know in the comments!

Goodnight my lovies, thank you SO much for stopping by!

Wednesday, November 9, 2016

Makeup Products Worth the Splurge pt. 1

Like most of us, I do not have unlimited funds to buy whatever makeup I choose to that day. I have to plan my purchases very carefully and decide what is REALLY worth the expensive price tag. The drugstore has been KILLIN' it lately with awesome alternatives to expensive makeup. Sometimes, I even find I like some drugstore or affordable products better. Now, everyone is different and things that might work for me may not work for you, so please keep that in mind as you continue to read. :)


Primers:
I have used a couple higher end primers, mostly in sample form, because some of them are just as much as a foundation, and that is crazy to me; but I do like drugstore primers just as much. I have 2 primers that I'm loving right now. First, the E.L.F Blemish Control Primer, it really keeps oils at bay for me. The second is the Maybelline Baby Skin Instant Pore Eraser. This for me works just as well any high-end pore filler that I've tried. High-end worth it? Not to me!

Foundation:
My high-end foundation is limited to Smashbox. But, that's because I've found drugstore foundations that are freaking miracle workers for my face. I can get full coverage with LOTS of staying power from the L'oreal Infallible Pro Matte foundation! I do have to mix 2 shades for my skin tone, but with the easy price tag, I don't feel bad about doing this. High-end worth it? Nope.

Concealer:
I will just start off by telling you my all-time favorite, hands down, concealer is the Tarte Shape Tape Contour Concealer. This has completely changed my outlook on any drugstore concealer. I can't find anything comparable to it in consistency or coverage. It's almost like a matte foundation that COMPLETELY covers dark circles. It doesn't crease or ever look cakey on me. High-end worth it? 200 times, yes.

Bronzer:
I used to be a die-hard Smashbox buyer. I always used their bronzers, seriously, for like 4 years. Back then, there wasn't such thing I knew about to contour and shadow your face, I just used it to bring some color to my porcelain skin. Back then, I would have told you that their bronzers were the best thing since sliced bread. Now that I've become completely obsessed with makeup I've tried many bronzers. I just bought one from Too Faced that is amazing! However, the Physician's Formula Butter Bronzer has become a bronzer that I can't live without. I'll use other things, but I always find myself layering a bit of the Butter Bronzer on top. So for me, I can live without my high-end bronzers as long as you leave me some Butter Bronzer. High-end worth it? Probably not.

Blush:
Wet 'n Wild has stolen the show with their color icon blushes. They have beautiful colors with great staying power. For me, this is a no-brainer. High-end blush worth it? Nope.

Stay tuned til FRIDAY for part 2! I'll give you the break-down of more makeup categories. Hopefully, this will help you make a more informed choice on what to spend your hard-earned money on! Let us know in the comments if you have any drugstore products you love more than the high-end dupe!

Goodnight my lovies, thank you SO much for stopping by!

Monday, November 7, 2016

Eyeshadow Eyeliner

Is it just me or is liquid eyeliner seriously the hardest thing, ever?  I practice all the time, and I just can't get those perfect smooth lines that you see all over Instagram or YouTube. I can SOMETIMES do something that is somewhat presentable, but that takes about 30 minutes and 15 Q-tips dipped in makeup remover. (No joke!!)


I recently decided that smokey eyeliner was my new thing. You can get the effects of eyeliner without having to be so precise. For this, I just use normally black or brown eyeshadow,but you are welcome to be creative and use whatever color you fancy that day!

What you will need: eyeshadow, an angled eyeliner brush or flat defined brush. You can use a setting spray or Inglot's Duraline to make your color more vibrant. But totally not necessary.

What you will do: dip your brush of choice into the eyeshadow, don't be shy. Tap off any excess so you don't have a ton of fallout onto your cheeks. Starting at the base of your lashes press the brush down, don't swipe back and forth, but kind of wiggle it to get the most color payoff. Work your way across your entire lash line doing this. You can also do a winged eyeliner doing this also. After you've done your lash line you can get a little more eyeshadow on your brush and lightly smoke the line upwards so it's not so harsh and won't show any mistakes. ;)

You can also use this technique on your lower lash line. 

If you want to get real fancy, layer a second color just above your previous line to get a more gradient effect. If you use black first, try using dark brown as your second color. This will add a ton of definition to your lash line and make your lashes look more defined.


If you have any tricks for flawless eyeliner please feel free to share in the comments!

Goodnight my lovies, thank you SO much for stopping by. 

Wednesday, November 2, 2016

Skin care!

My skincare routine is constantly changing. The seasons change my skin drastically! The fall and spring are the hardest on it because one day it's hot and the next day it's cold. I have a couple products that have been working for me this fall. I have two drugstore and two more expensive products to share. Testing these out and hoping they work is the hard part, my rule of thumb is about one week. That gives me enough time to tell if I love it or see if it's going to break me out. 


Let's get the hard ones out of the way first aka the ones that are going to break the bank.

The first is the Glamglow Thirstymud Hydrating Treatment. This product is like a thick moisturizer. You can basically layer it on thick and leave it for 10-20 minutes then wipe away excess and massage any left on the face. Or apply a lighter layer and sleep in it. It smells amazing and I always feel like my skin feels it's best in the morning when I sleep in it. It is a little too thick for daily wear under makeup for me. For a 1.7 ounce jar it retails for $69.00 at Sephora, but shop around. You can find it on Amazon for $50.00!
The next mask is Origins Clear Improvement Active Charcoal Mask. This is used to clear out your pores. Apply an even layer to your face and let it dry then I like to just wipe it off with a warm wet washcloth. I apply a nice moisturizer afterwards. This really seems to leave my face smooth and it feels extra clean when I use it. I've found that the price is the same everywhere running at $26.00 for a 3.4 ouce tube.

Next is two more affordable products, they are both from E.L.F.  You can order them online or sometimes find them in different drugstores. First is the Daily Hydration Moisturizer.  This retails for $8.00. It is perfect for me to wear wear under foundation without it feeling heavy. I wouldn't think that it would help moisturize really dry skin but it is a nice moisturizer for oily skin, in my opinion.
The next is the Blemish Control Face Primer. It is only $6.00. It is infused with salicylic acid, vitamin E, and tea tree extract to control blemishes while it helps your makeup stay on with a smooth, silky finish. All of my foundations perform perfectly over this primer and it really helps control my oil throughout the day.

I hope this helps you find or try out a few new products! Let us know in the comments down below if you have any great skincare products that we all need in our lives

Monday, October 31, 2016

A letter to the Girl too scared to wear dark lipstick.

To all of you girls that are too scared to wear dark lipstick, dark nail polish, or something completely out of your comfort zone; DO IT. And I don't mean that in a pressure you kind of way. I mean it in a "do what you want without feeling like you have to please people" kind of way. Here's why I think you should do it:

It's good to step out of your comfort zone. Stepping out of your comfort zone challenges you. It helps you to learn more about yourself. It helps you learn to adapt to different things. I don't want you to completely change your look in one day, but I want you to change one thing and see how it makes you feel. Wear that dark lipstick one day. You might check the mirror every 10 minutes to see how you feel, but at the end of the day, you will feel like you have accomplished something by changing.
Wear the makeup for yourself. Don't skimp on the eyeliner or bold colors because you think people will stare. And don't skip it the next day because someone didn't agree with it. You wear that dark brown or black lipstick like you own it, (which you technically do because YOU spent your hard-earned money on it!) You wear that bold lipstick because deep in your heart you know you want to. Don't let someone else tell you that "natural is better." If YOU want to wear a BLUE lipstick that YOU bought, then you rock that lipstick!
No one notices your flaws more than yourself. I see a lot of, "I can't wear that red lipstick because my lips are uneven." Let me tell you right now girl, no one will even notice! And if they do, they are too close to your face! Plus, there are so many ways to trick the eyes. Get yourself a good lipliner, and a flat makeup brush. Put on your lipliner then lipstick, and use that brush with a tiny bit of concealer or foundation on it, and fix any mistakes you might have made. Make time throughout the day to touch up. We all go to the restroom, take your lipstick with you. After you've washed your hands, make it a part of your routine to touch up your lipstick.

We live in a time that WE get to choose what we put on our faces. We get to decide what makes us feel our best. And let me tell you, wearing something because you think it will be a crowd pleaser is not feeling your best. You will have a feeling inside of you that something isn't just right, and that's because you should do things for yourself! As women with families and jobs and responsibilities, we don't always get to be selfish. We look after our children or our spouses needs before our own most times. Your makeup and your face isn't a thing that YOU should sacrifice. You should wake up every day and put on whatever the hell you want to put on. You do it for yourself. I cannot tell you enough times, WEAR THE MAKEUP THAT YOU WANT TO WEAR. When you feel your best, you can give your best. If you feel like a million bucks in the glitter eyeshadow everyone around you will feel those vibes. The happier you are, the happier you can make others. Please, ladies, let's spread positivity in this world of hate! There are so many more important things going on in the world, we don't need to tell someone that the red lipstick they are wearing isn't the right shade. TELL HER SHE IS BEAUTIFUL. You never know how many times in her head she went back and forth about wearing that color. Tell her that her eyeliner is bomb.com even if you notice they are a little uneven. How many times do you think she may have wiped it off to start over? Compliments are free. Hand those bad boys out to everyone you know. And let's end this with something that all of our mothers' taught us: If you don't have anything nice to say, then don't say it at all.

Goodnight my lovies, thank you SO much for stopping by!

Friday, October 28, 2016

Favorite Nail Polish

I've put together a top 6 list of my favorite Fall Nail Polishes right now. I've been really into dark colorful polishes but there's nothing like a pinky neutral color. :)

The first ALL TIME favorite is the top coat. It is from Seche Vite. It is literally the fastest drying top coat I have ever tried. It leaves the nails with a perfect gel-like shiny finish. You can buy it here from Amazon for less than $6. Well worth the money for the quick dry formula in my opinion.

1. Essie -- Pool Side Service
     A great cool-tone blue/green/gray color
2. Ciate London -- Dangerous Affair
     A deep pink/red berry color
3. OPI -- Incognito in Sausalito
     Very deep navy blue
4. OPI -- O Suzi Mio
     Deep purple
5. Wet n' Wild -- Grape Minds Think Alike
     Dark Red/Purple
6. Sinful Colors -- Taupe is Chic
     Light Nude with a touch of Pink

Leave a comment down below with your favorite nail polishes for the Fall! What are your go-to polish colors??

Goodnight my lovies, thank you SO much for stopping by!

Wednesday, October 26, 2016

Fall Favorites


Aside from it getting so dark so early, Fall is probably my favorite season! I've put together a list of my fall favorites to share with you guys. It's going to be a mixture of beauty and other items. But all so Fall. :)

Cozy Sweaters
Probably my favorite article of clothing to wear. You can get long sweaters, cropped sweaters, and everything in between. I was recently in Forever 21 and found some really amazing things. I found this loose knit sweater and bought it in coral. But it really is a soft blush color in real life. It's long enough to wear with leggings and warm enough to wear without a jacket. I threw on a scarf and I was out the door. I also got this Boxy Ribbed Knit Sweater. It's so loose and flowy. It would be a perfect sweater for Thanksgiving when you are going to be eating a ton and don't want to have room for your tummy to grow ;)

Scented Candles
Let me tell you, Yankee candle is killin' it with the fall scents! I went in there and could have spent an entire paycheck on candles alone. I got my hands on Cranberry Chutney, Autumn Wreath, and Apple Cider. Cranberry Chutney is perfect for those of you who like the sweeter scents. Autumn Wreath and Apple Cider are more of the "spicy" scents.

Deep Lipsticks
I'm always a little self-conscious when wearing darker lipsticks. I feel like everyone is staring at me wondering why I would wear such a bold color, and sometimes I ask myself the same thing. But, I have to keep telling myself that it's MY makeup and MY face, I can do what I want! *girl power!* My favorite is from The Balm, it's called Charming and runs around $17 each.

Drinks
I have 2 drinks that I love to have in the Fall. The first is a good Apple Cider! There is nothing that can say it's time to carve pumpkins like a good Apple Cider. My favorite hot drink is French Roast coffee made with sweetened condensed milk. Just brew your favorite brand of coffee but make sure to buy a french roast. Add about 2 tablespoons of sweetened condensed milk and stir. Add more or less depending on how light or dark you like your coffee. It adds the perfect sweetness to your coffee.

Burgundy Eyes
I'm not sure where this obsession came from, but I've been dying for burgundy eye makeup lately. My favorite inspo was from Kathleen Lights on YouTube. Watch here video here to see why I'm in love with this look!

That's all I have for my favorites right now, guys! Comment down below if you have any favorite things exclusively for fall! I'd love to hear about them :)

Goodnight my lovies, thank you SO much for stopping by!

Monday, October 24, 2016

New Products!

I made my way to my local Sephora this weekend and got my hands on a few products that I had been drooling over for a while! How exciting! I don't splurge a lot on expensive things, but it had been a while, and I was overdue!


Becca X Jaclyn Hill Champagne Splits $38
This beautiful split pan has half highlight and half blush. Perfect for any look you are going for. I got the Champagne Pop and Flower Child combo. Champagne Pop is a soft white gold with subtle pinky peach undertones. Flower child is peachy pink with soft gold highlights. The colors are GORGEOUS together! The formula is astonishing. It so silky smooth and glides on the skin like butter. I think everyone should own at least one of these! The beautiful packaging is enough to make you feel like you''re putting pure gold on your face.

Benefit Cosmetics Precisley, My Brow $24
I've been obsessing over owning something from the Benefit Cosmetics Brow line because every time I see something on instagram or twitter the perfect brows are always done with one of their products! I decided on this fine brow pencil for days I didn't want to do a lot of work. I can just had a few tiny, hair-like strokes with the pencil and I'm done! It's super pigmented in color so use a few light hand! The built-in spoolie makes it easy to brush through after you've penciled them in to get rid of any harsh lines.

Laura Mercier Secret Brightening Powder $25
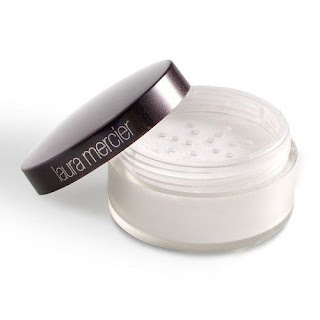
This is used as an under eye setting powder, to brighten and light dark circles while not settling into fine lines. It's formulated with tiny light-reflecting pigments to really brighten up your face. It's a super smooth, finely milled powder. It stays silky smooth on the skin all day without building up in the fine lines of the undereye area.

Let me know in the comments your wish list items!

Goodnight my lovies, thank you SO much for stopping by!

Wednesday, October 19, 2016

Wet n' Wild Color Icon Eye Shadow

I was browsing Rite-Aid today (local drugstore for anyone wondering) and at first I wasn't having any luck in the makeup department. Then I spotted them. Wet n' Wild had 3 different eyeshadow palettes. Now, I watch YouTube, a lot, and I've heard nothing but good reviews on these particular palettes. Trusty YouTubers stated that Wet n' Wild knew what they were doing when they made these colors. So when I saw them, staring at me, I knew I had to have them. It also was a bonus that there was a sale going on so, I got all 3 palettes for $10!


 My favorite is Comfort Zone. It has all the cool weather vibes going for me! The only problem with this little palette is there aren't any matte shades. I'm going to have to dip into another palette to get my crease color. But if a little shimmer for your crease isn't a big deal to you, then I say rock this whole palette with a different look every day!
 Poster Child does have a couple matte shades in the lineup, but they weren't my favorites. They were a little chalky/powdery for my taste, but I'm sure with a little work, you can make them work for you! I do appreciate that the black shade isn't like stark black, so it would be easy to blend and build up to ask dark as you'd like it.
Petal Pusher is probably my second favorite. Again, no matte shades, but these are so freakin' cute, who cares? Not me! Purple looks great with my brown eyes, so I will definitely be putting this palette to work!

Wet n' Wild online has these palettes for sale for $4.99. That was the original price at Rite-Aid for me, I think Wal-Mart sells them for about .50 cents more. These are the only 3 palette selections they have in the 8 count. I did get to play around with them a little bit, and they seem to go on just as well as my higher end shadows! They promise to have all-day, crease-free wear. I have not tested this out, but just from the amount of scrubbing I had to do in order to swatch them, I don't doubt that this is a true statement.

If you have any hidden gems from the drugstore leave a comment down below! Help a sister out. I'm always looking for new things to try. Although it can't be lipstick, I was told by my sister to stop buying lipsticks! Ha-Ha. That was a good joke, huh? ;)

Goodnight my lovies, thank you SO much for stopping by.

**Side note: These were swatched on my arm with primer underneath and shot with the flash on my camera. Sorry, I didn't get a shot in the daylight of these for you! They are beautiful, though!

Tuesday, October 18, 2016

Maybelline Fit Me Shine Free Foundation Stick


I have wanted to try out a stick foundation for a while now but with my oily skin, creams are just too much. I typically stick to liquid matte foundations. One of my faves has been the Maybelline fit me matte + poreless. When I saw that Maybelline had a stick foundation I knew this was going to be my first tester.


It claims to be an oil-absorbing powder foundation stick that delivers a natural matte finish. I agree with the first claims. It goes on very smooth and blends out nicely with a buffing brush. It is pretty matte looking alone, but I always set my foundations anyways.


It also claims to stay shine free and minimize your pores for 10 hours. This statement I will say is false. I work in a busy salon for 9 hours a day and I always have an oily chin by the end of the day. It says medium coverage you can build up to this, but one layer is not medium alone.


I wore this on my day off when I wasn't running around and it seemed to last longer. I also feel it performed better with only one layer. If you are looking for a light coverage stick this would be perfect for you.


The shade range for this makes me a little upset. I am 112 in the Matte + Poreless but with this, I need 110 & 115 to match me. So while the price is less expensive than most regular foundations, I need 2 different shades in the stick, equalling the price of a regular foundation.


I will continue to use these until they are gone, but I don't think I will repurchase them. I'll probably try another brand and see if I can find something that I like.

If you have tried these out let me know in the comments down below!


Pros :
-Super easy to apply
-Blends out easily


Cons:
-Shade range lacking
-Doesn't last long

Goodnight my lovies, thank you SO much for stopping by!

Friday, October 14, 2016

3 Products You Didn't Know You Needed

I have recently been trying out a few new things, and I found three that I think everyone should own. They will definitely make your life easier. I'm sure you're wondering what these products may be, so let me tell you about these amazing treasures.


The first is the Simple Cleansing Micellar Water. This is used to cleanse your face without any rinsing. You simply wet a cotton round with it, and you literally wipe away dirt, impurities, and makeup. Seriously, I wiped away LIQUID EYELINER with this stuff. It is made with vitamins and triple purified water to not only cleanse, but also moisturize your skin and unclog your pores. It is super gentle on the face, and I have no burning in my eyes when I use it to remove eye makeup. This is a 6.7-ounce bottle for $7.99 at Ulta.

The second miracle product is Mario Badescu Drying Lotion. At $17.00 it is a little pricey, but I've found it's worth every penny. This is used as an overnight acne treatment. You are supposed to let the ingredients settle in the bottle. There will be a pink product on the bottom and a clear liquid on top. Once you have let it settle, you dip a q-tip into the bottle  to the bottom pink portion. Apply this to any breakouts you have before bed and let it do its magic. It's not supernova magic that will make breakouts disappear overnight, but I've noticed that I can get rid of any pimple in two or three days using this. It claims to be safe for all skin types, and not harmful to sensitive skin. I totally agree with that. I have super sensitive skin and this has never irritated my skin.

The last product that I have been loving isn't skin care, but it is a beauty product. It's the Inglot Duraline. It's $11.00 for a .3-ounce bottle. It is sold to use as a clear liquid that intensifies any color powder turning it into a water-resistant liquid. I have not used it for this because I use it to bring any gel eyeliner or eyebrow pomade back to life. If you add a tiny drop into your dried out eyeliner it instantly returns it back into the easy to work with cream it was meant to be. No more throwing away gel eyeliners or brow pomade because they dry out faster than we can use them!

These are my three new finds. If you have any products that you love that you think EVERYONE should own comment down below!

Goodnight my lovies, thank you SO much for stopping by!
Monday, October 10, 2016

$10 or Less!

Wet n' Wild Au Naturel Palette Nude Awakening


I'm always on the hunt for the next best thing. But honestly, I don't want to spend a lot of money on that thing. I recently placed an order from Wet n' Wild. I'm a sucker for the "spend X amount of dollars for free shipping." So, while I was trying to fill my cart up I came across the Au Naturel Palette, at only $6.99 for 10 shades I couldn't resist.

I have played around with this palette a few times in the last couple of days and I must say I do really like it. The matte shades on my light skin tone, are perfect in my crease. There is a bone color that is just the right shade to set my primer and highlight my brow bone. The others are great for the crease. The rest of the 6 shades basically I'd put on my lid for a little shimmer or metallic finish, depending on how I was feeling.

This by no means is the best palette I've used, but for the price you really are getting a good deal. If you are just getting into makeup and wanting to learn or practice different looks this is a good place to start. For me, Wet n' Wild really does have some hidden gems if you are willing to look for them!

Pros:
-affordable at only .70 cents per shadow!
-you can create tons of different looks
-very blendable

Cons:
-lots of fallout! (make sure to do your face makeup after your eye look with these!)
-you NEED a primer to get good pigment.

Final thoughts:
Give Wet n' Wild a try! You can try out different products without breaking the bank. And sometimes, you find some real gems.

If you have any Wet n' Wild products that you love comment down below!

Goodnight my lovies, thank you SO much for stopping by!


Friday, October 7, 2016

How I Clean My Makeup Brushes

Cleaning your brushes is very important, especially if you have sensitive skin. If you don't clean them frequently you risk spreading bacteria on your face, which results in more breakouts. Also, cleaning your brushes removes any build up on them, this can cause them to not apply your makeup properly, you can have streaky foundation or spotty eyeshadow because of build up.


I found a really good daily cleanser from Amazon that is great if you want to use the same brush for different colors but you don't want to mix. It cleanses fast and dries even faster. It's by the brand Shany and it's called Detox Professional Brush Cleanser. It's $11.95 for a 4 oz bottle.  I like to just spray a couple sprays onto a paper towel then swirl the brush in it.

I normally deep clean my brushes every week or two depending on how much I use them. This can be a pain in the butt depending on how many you have, but so worth it! I ordered this little Silicone Brush Scrubber from Amazon for like 2 bucks! I also just use baby shampoo to wash them. The fastest way I have found is to gather everything around the sink that you will need. And, don't forget a towel to lay your brushes on. I always let them lay flat when they dry and it works perfectly fine for me.

I put a few in the sink and get the bristles a little wet. Then pump some shampoo on the scrubber then swirl the brush in it. I do like 10 at a time then rinse them all at the same time. (This will also save on water!) I work in small batches until I'm all done. I squeeze all the water I can out of them and let them dry overnight.

Make sure you rinse all the soap out of them, if you don't they will be scratchy when they dry! I don't feel like you need to spend a lot of money on expensive cleaners when baby shampoo works so well! I also buy the shampoo with a pump on it, it makes it a lot easier!

Let us know down below if you have any specials tips or tricks for washing your brushes!

Goodnight my lovies, thank you SO much for stopping by!

Wednesday, October 5, 2016

DIY Hair Extensions


Have you ever been walking through the beauty supply store and come across one long, hula skirt looking piece of hair? Have you been wondering and trying to figure out what to do with it? Or how it is used? I'm going to tell you exactly how to take that strand of hair and turn it into clip-in extensions.

Here's what you're going to need:

1. A weft of hair - this is just one long piece of hair extension2. A pair of scissors
3. A Hair sewing needle
4. Hair sewing thread
5. A 12 pack of wig clips

I decided that I was going to make 2 pieces with 3 clips, 2 pieces with 2 clips, and 2 pieces with 1 clip. The pieces with 3 clips are going to go in the back of your head. So measure out long they are going to be. They are going to sit even with the middle of your ear and the top of your ear. Smaller is better than bigger because you don't want it to go directly hairline to hairline because then they MIGHT show.

For the lowest piece, I did 3 layers to make the section a little thicker. This layer will be hidden by the rest of your hair so don't worry if it looks a little bulky. The rest of the sections I only doubled up. If you have super fine/thin hair I suggest not doubling them up. The flatter they lay in your fine/thin hair the better.
layers tied together

I first tied them together around the same places I will sew the clips on. This will help you keep everything together and neat. I start off in the middle then do either side. I also measure out and cut all the pieces before I start sewing.


I'm by no means an expert at sewing. All I did was make sure everything was laying flat together, place the clip where it's going to go and sew into the top hole of the clip. I just went in a little circle and sort of tied knots as I went along to make sure it was secure. I did each clip separately so it was very little sewing involved.

After you've finished, you can clip any long pieces of string hanging out then wash and condition your extensions. You can let me air dry or blow dry them on a medium heat (if they are real human hair.) If they are synthetic hair read the package directions for styling tips.

This 6 piece set is perfect to add volume to any hair style. They are especially good for anytime you will be in pictures. It just gives your natural hair the perfect amount of oomph.

Please, let me know if you have any questions about making your own clip-in extensions. I would be happy to help any way that I could.

Goodnight my lovies, thank you SO much for stopping by.

Monday, October 3, 2016

The Light between Oceans: book review

The Light Between Oceans by M.L. Stedman


I finished reading this book last week, but I couldn't put into words what I felt about the book right away. It's taken me a while to get all of my thoughts down in one place. If you read my last review, you know that I try not to have any spoilers in my reviews. I'm going to TRY not to give away anything that the back of the book or the movie preview doesn't.

I'll really start off by saying that this was a really slow read for me. I could not, for the love of God, get into the beginning of this book. I went back countless time to re-read sections and even chapters wondering what words I had just read.

Once Tom met his soon-to-be bride, I was hooked. I'm a sucker for a good love story. Even the love story starts out slow. And, I suppose, that  it's all apart of the storyline, it keeps you wondering, keep you wondering what will happen next.

Tom is one of the main characters, actually, the main character. He meets a lovely woman named Isabel, they fall in love, and they move to the island he currently occupies as a lighthouse keeper. Isabel desperately wants a family and has 2 miscarriages along with a stillbirth. One day, a boat washes ashore carrying a baby and it's dead, presumably, father. Tom wants to report the boat, Isabel wants to keep the baby. She claims the baby is a gift from God, and they should keep it.

They name her Lucy. She has become a family member to both of them. But there is a moral dilemma here. Tom still wants to tell the truth and Isabel still wants to keep her a secret.

They only get a supply boat once a season, and it's easy to keep their secret. But once they go to the mainland it's harder to keep the secret. Tom is reminded of his moral dilemma and it gets harder and harder to keep their secret.

One of them makes a decision that effects all them. And who is to say that it is the right decision?

The book keeps me guessing and wondering through the last half of it. It started off as a slow read for me and turned into something that I could not put down. The whole moral dilemma has you wondering who will do right and who will make decisions only for their family?

This is definitely something that I would recommend anyone to read. If you love to read you will love this book. It was a tad of a challenge for me because it was based in the 1920's and from Australia. I'm used to reading young adult books from this time frame. This REALLY challenged me and I loved every minute of it, even though some parts I thought were quite boring.

If you have read this book let me know! If you have read it and also watched the movie let me know how it compares. You can also e-mail if you want to talk about the book in more detail without spoiling it for anyone!!

Goodnight my lovies, thank you SO much for stopping by! I hope you enjoyed this book as much as I did!

Friday, September 30, 2016

$10 or Less!

e.l.f. Illuminating Palette


Any makeup addict wants to glow. We love to add a little (or a lot) of highlight to our cheekbones, nose, forehead, chin, brow bone, just bathe in it basically. We all don't want to spend the big bucks for the high-end highlights, though. I've put the e.l.f Illuminating Palette to the test. 


You can buy this online for $6. It comes with four different shades. They are all beautiful colors that you can mix and match to get your perfect shimmery, highlight.

I found them to be a little bit powdery, but if you tap off the excess off of your brush, it seems to apply just fine for me. It does have like really small glitters all in it, so if that isn't your thing, you probably won't like this.

I have worn this all day to work. I work in a pretty busy spa, I do A LOT of blow drying and it can get pretty hot in there. My nose and chin get really oily, but the highlight hangs in there. I came home today after a long day of work, and STILL had my glow on! Pretty impressive. I will add that I do use a setting spray, I feel like that helps a lot.

Pros:
 -Very affordable
 -4 different shades
 -lasts all day

Cons:
 -a little powdery

If you are looking for an affordable way to glow then this is for you! Let me know if you have tried it and what you think of it!!

Goodnight my lovies, thank you SO much for stopping by.

P.s. If you order through Ebates you can earn 8% cash back now!

Wednesday, September 28, 2016

Liquid Lipsticks!

The Balm's Meet Matt(e) Hughes Long Lasting Liquid Lipstick


The Balm's liquid lipstick was the first one that I ever tried. I think I got a sample of it from my Ipsy bag. I was immediately in love. I loved the vanilla mint flavor, I loved that it stayed on, and I loved that it was truly matte.


 I didn't really know about the whole liquid matte lipstick craze at the time, so this was new to me, and I
had nothing to compare it to, but now every time I try a new one, I always compare them to this one. For me, it truly is the best for my lips (so far).

So the rundown: You can order them online through The Balms website for $17 each. There are 12 different shades to choose from. In my opinion, lots of skin tones could wear any of the colors. They claim to be long lasting and I totally agree. I can wear these all day with one touch-up after lunch. A light snack or drinking water don't really affect them.

I have 2 of the shades: Charming and Committed. (Also, can we talk about the shade names? So cute. Adoring, Honest, Devoted. All qualities you'd want in a man.)


The formulas glide right on super smooth. And one coat is all you need. They dry super fast on the lips, and the formula is comfortable throughout the day, it never leaves my lips feeling dry. Plus, they are (almost) transfer resistant. Sometimes, I get a little on my straw or rim of my glass. $17 is a little pricey for a lipstick, but when you think you only have to apply once or twice a day they will last months! For me, a staple in my lipstick collection, and I they will stay there!

Let us know in the comments what your favorite liquid lipsticks are!!

Goodnight my lovies, thank you SO much for stopping by!


Monday, September 26, 2016

The No-Contour Contour

I am all for people doing makeup however they choose. It's your face, your rules. I love all sorts of makeup, and sometimes am in awe of the art people can create with their faces. This blog is for those of us who don't have time for a full face, structured contour, lashes to God makeup every day. It's a trend that I've seen floating around the internet that I've been excited to share with you. The concept is simple: bring out your best features without caking the makeup on. This means, set down the full coverage foundation, set down the contour and highlight palette, and set down those false lashes.

We are not going to create shadows with contour powder or cream. We aren't going to dip into the bronzer to give us a sunkissed look. We are simply going to use highlighting powder to only bring our favorite features to the light, in return, it will give us the illusion that we have contoured.

First, I am going to just smooth and even out my skin tone with a light pore filling primer and BB cream as our foundation. If I used a full coverage foundation for this, I will hide too many of my natural, beautiful shadows created by my bone structure. I'm going to use a little bit of concealer to hide my dark circles, in a "V" shape under my eyes, this helps brighten my whole face up.  If you have oily skin, like me, I suggest setting it with a light powder.

I always fill in my brows, but for this look, I'm going to only use a pencil to get the most natural look I can. For my eyelids, I'm going to use an eyeshadow that is only a shade or two darker than my natural lid to just give a little definition and to cover up any redness or veins showing. I'm going to use a little highlighting powder under my brow bone to bring it out. I'm also going to use a little bit on the inner corner of my eye. I'm going to apply two coats of my favorite mascara, and I'm done with my eyes.

Instead of my normal bronzing routine, I'm going to just add a little bit of blush high up on my cheekbones and add some highlighter to the tops of my cheekbones. **Tip: If you have a round face, and want to make it look slimmer, add the blush higher up on your cheekbones. If you have a longer face and want to add a little roundness, add the blush more towards the center, or on the apples of your cheeks. I'm also going to put a touch of highlighter to the cupid's bow of my lip, and just a tiiiiny bit to my chin. I feel like my chin dips in just a tad, and I want to help bring that to the light.

With my favorite gloss, I've completed this look. It's so easy to do, and so fast. It will make your morning routine so much easier, and also, bring your best face forward.

For me, makeup is not a mask. It isn't something that I hide behind. It's just something that I like doing. I like to create the art on my face, or on others. Sometimes, though, I just want to use makeup to create a more natural, perfected look. Obviously, makeup is not natural, but no one wants to see the evidence of my lake of sleep or over-plucking I may have done in 9th grade.

Goodnight my lovies, thank you SO much for stopping by!